
The charger light should display a small red light indicating that your battery is not full. Charging socket loose may cause no light on charger too.
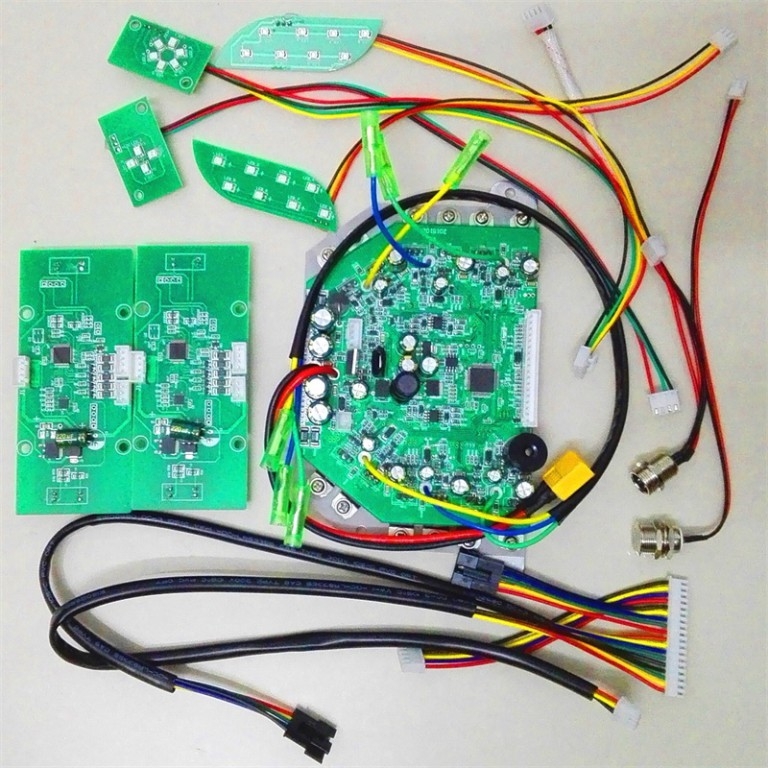
Design Hoverboard Charging Port Scooter Repair Parts
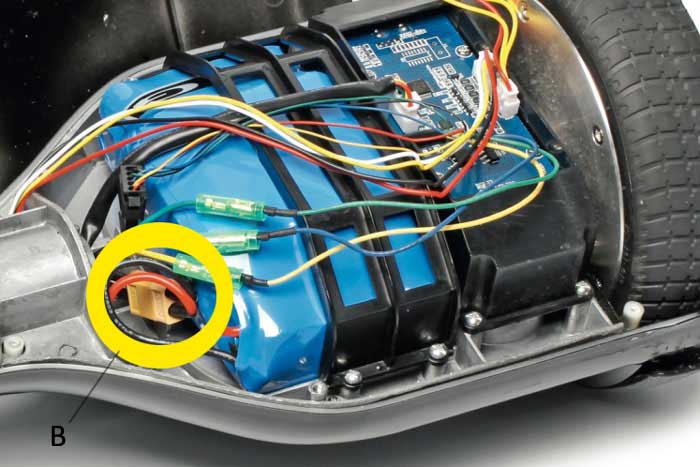
Later on, one xt60 end will be connected to the battery and another one, to the controller.

Hoverboard charging port wiring diagram. Step 5 solder the power to the plug. You should buy this plug if you charging port is broken, missing pins, missing wires, or other physical damages. We hope you enjoyed it and if you want to download the pictures in high quality, simply right click the image and choose.
On wiring diagram for hoverboard. Be careful to insert the correct way round, look out for the groove. Subsequently exasperating to remove, replace or repair the wiring in an automobile, having an accurate and detailed hoverboard charger wiring.
You should always try this combination of wire connections first for the 3 color separate wires. You should always try this combination of wire connections first for the 3 color separate wires. However, it doesn’t imply link between the cables.
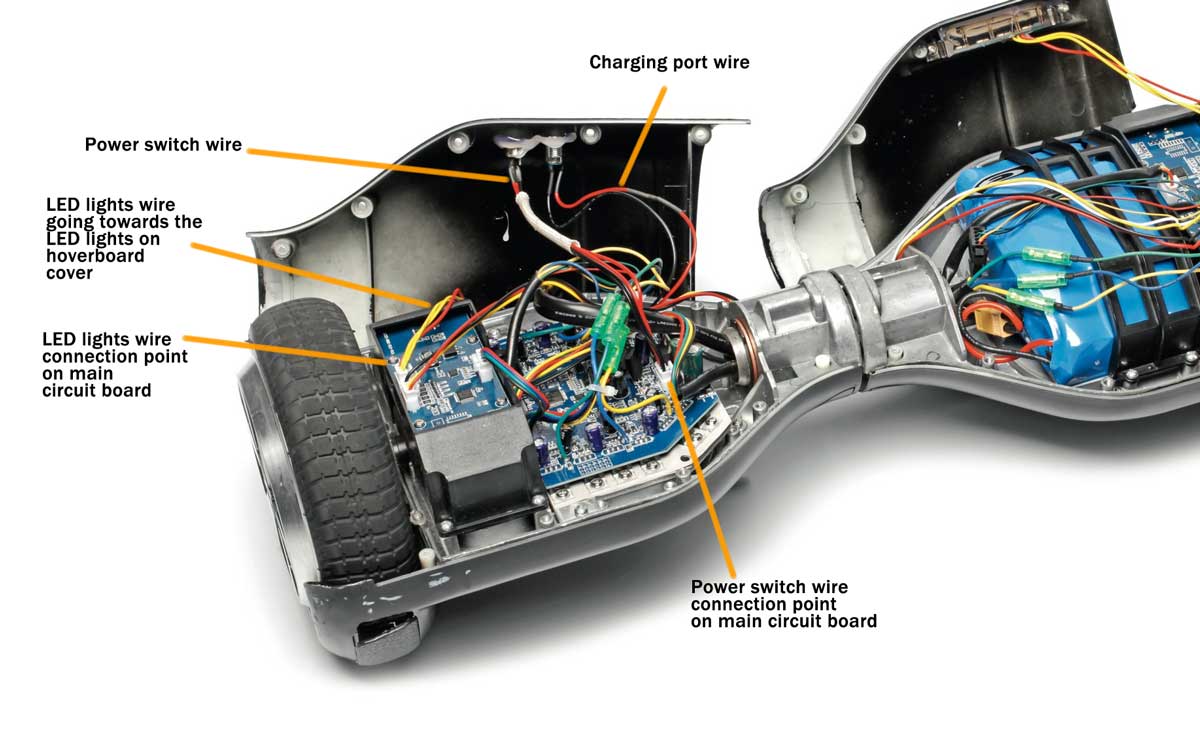
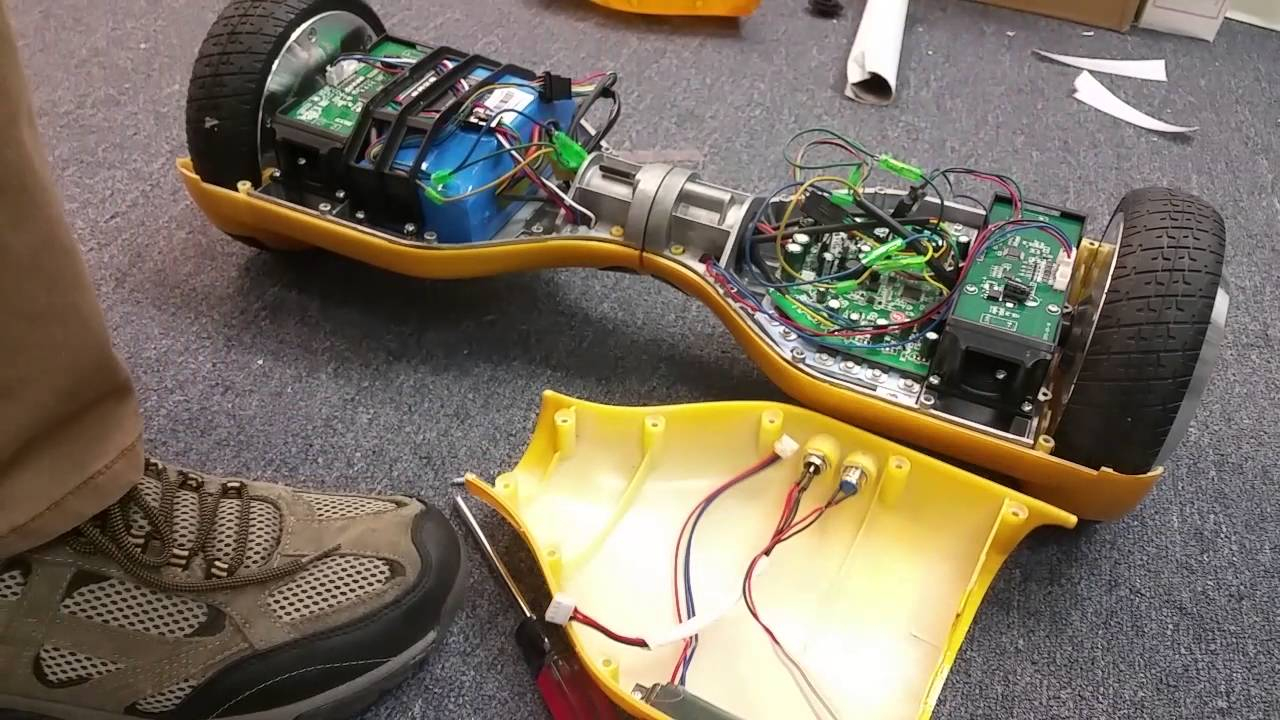
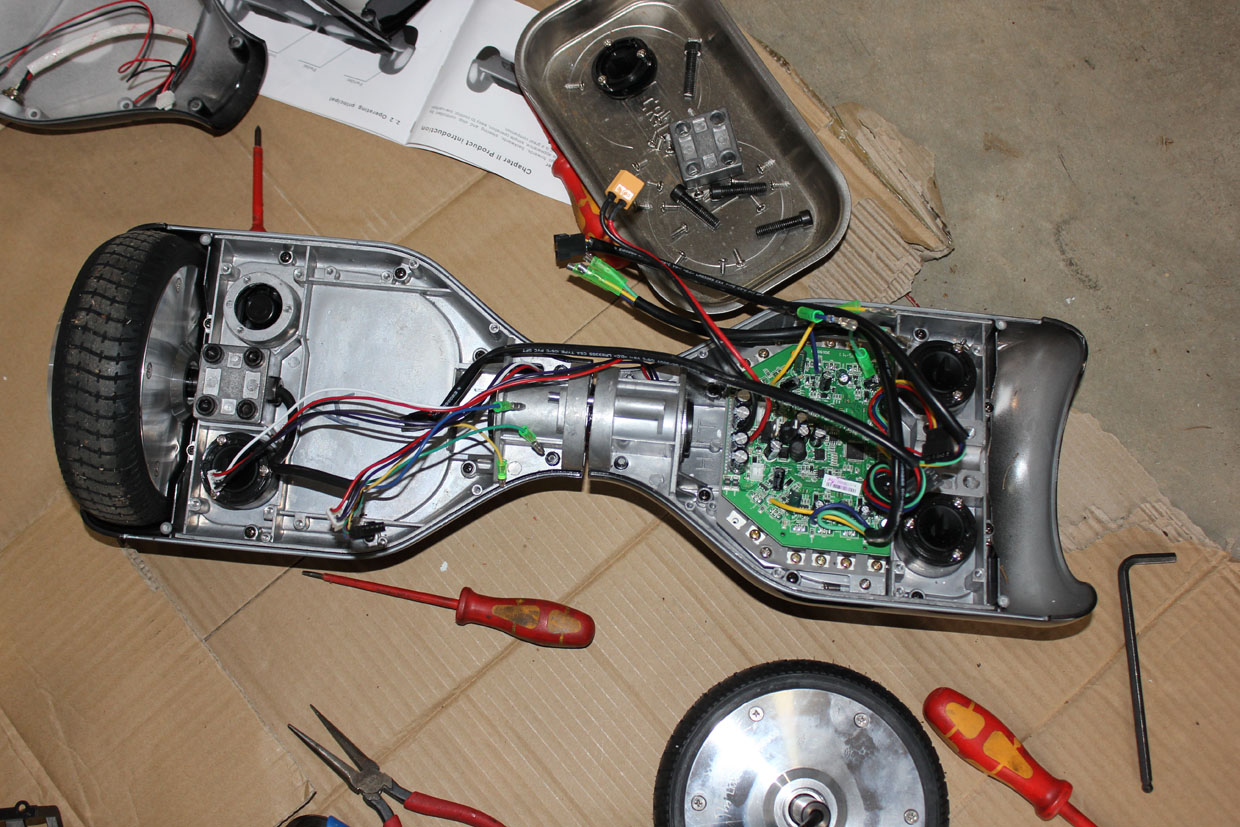
You can open the back cover in charging port side, unplug and plug all the wires, and try the charger again. To install charging connector, was needed to desolder wires, install locking nut, insert wires thru the hole and solder them back. Wondering if could cut wires and splice the 2 pin connection to this charging port and make it work.
Otherwise, the structure won't work as it ought to be The way you can tell it's a 3 phase ac is because you have 3 separate relatively large wires connected directly to. You have unplugged the charger from the wall and then from the charger port.
With such an illustrative guide, you are going to have the ability to troubleshoot, avoid, and complete your tasks without difficulty. Sometimes charger shows no light because your charging port is broken. This problem is typically found when new parts are installed, a hoverboard got wet, or you've owned your hoverboard for a while now and it has been heavily used.
At times, the wires will cross. The perspective is from looking at the plug. Each part should be set and linked to different parts in specific manner.
When the red light on a battery charger blinks that is a sign that something is wrong with either the charger or battery pack. That has 3 prong 2 pin connection with a 2 wire charging port. The charging port is the newest style (4 wires style).
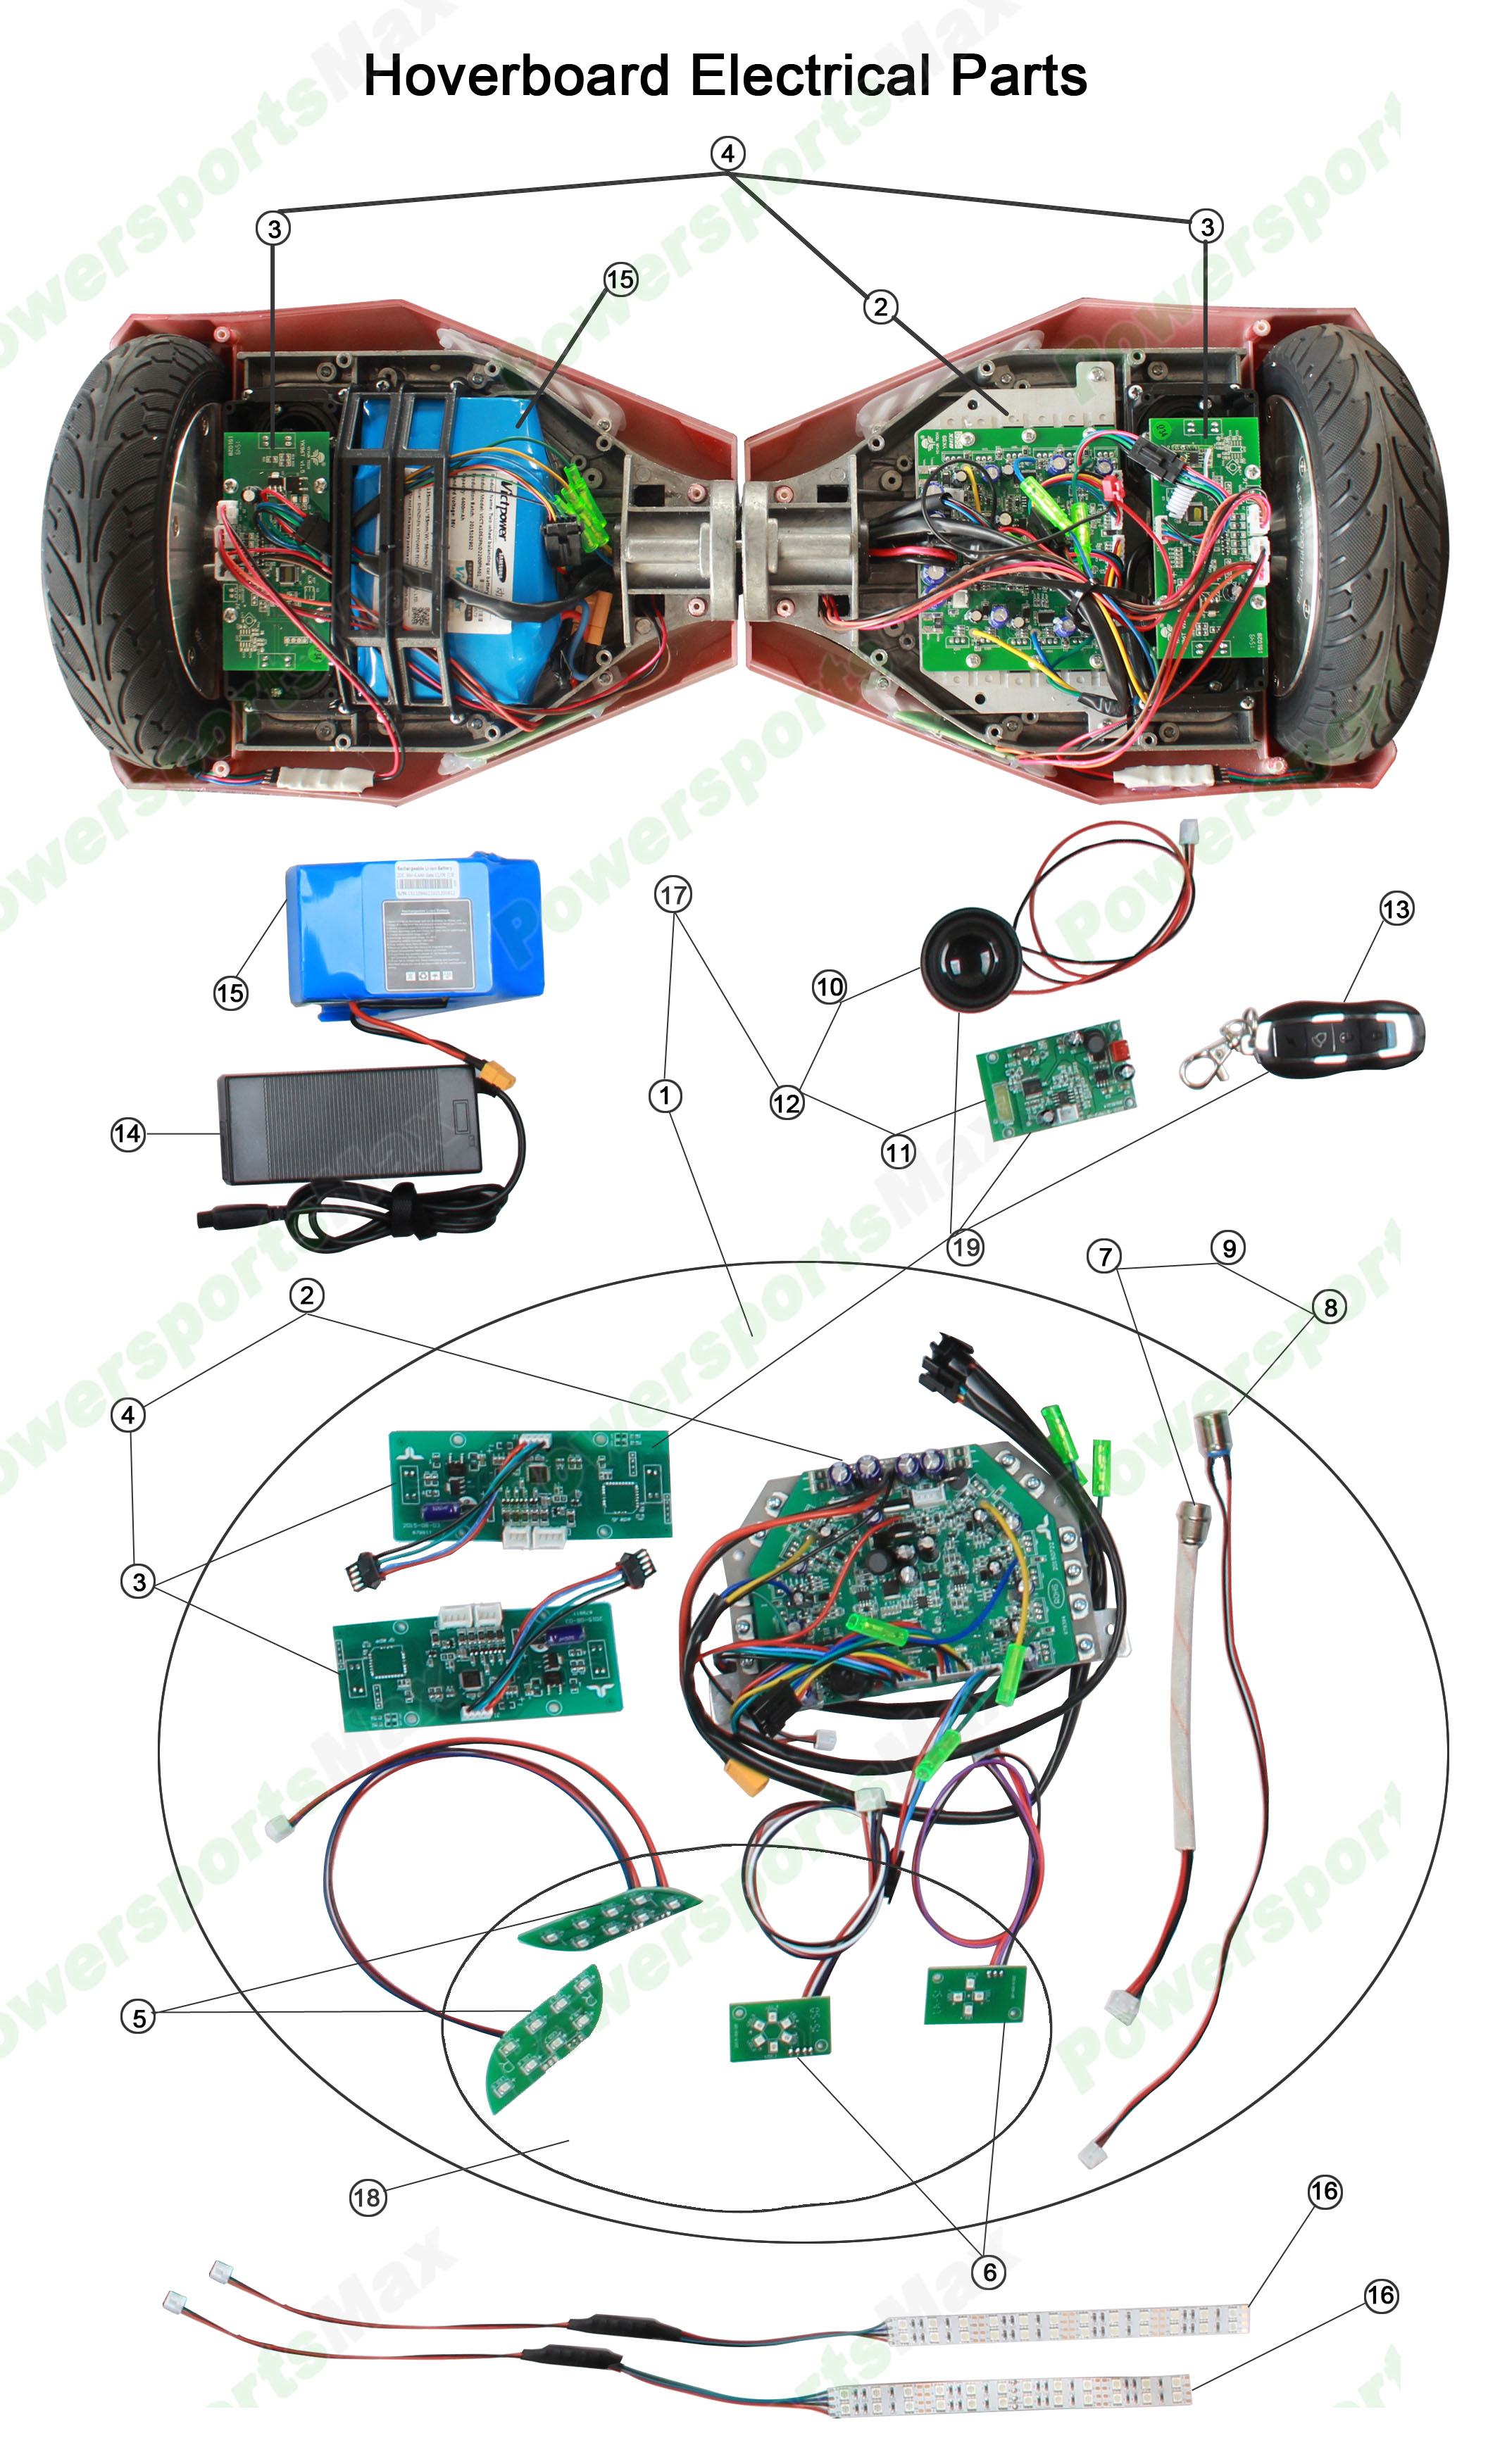
Making us think there are actually two motors embedded in the wheels. In that case, you can purchase a new one online and learn to replace by your own. Now, your hoverboard is fully charged, you can use it for a ride.
There will be main lines which are represented by l1, l2, l3, and so on. You must do this on both sides. If you happen to have a different style charging port, check out our other port styles below:
Compatible with 6.5 inch, 8 inch, 8.5 inch, and 10 inch scooters, this power charger port comes with a single 4 wire style female input as well as the washers and rings to keep it tight. Each component should be set and linked to different parts in particular manner. You can now connect to the mains socket and turn the power on.
Do not buy this if your plug has a black end. The trouble in reality is that every car is different. As stated previous, the lines at a hoverboard wiring diagram represents wires.
In step two, we see that the power brick says the orientation of the polarity vis a vis the plug. Yiyun yk31c speed controller 24v (36v and 48v) wirring diagram speed controller item #yiyun yk31c battery motor brake lever battery indicator light throttle charging port lock power switch on back battery 12 volt charger port motor brake levers throttle yk31c diagram brake brake cha port sp in gover mo or t tery ion. After that, the charging of the hoverboard is complete then the charger turns to green.
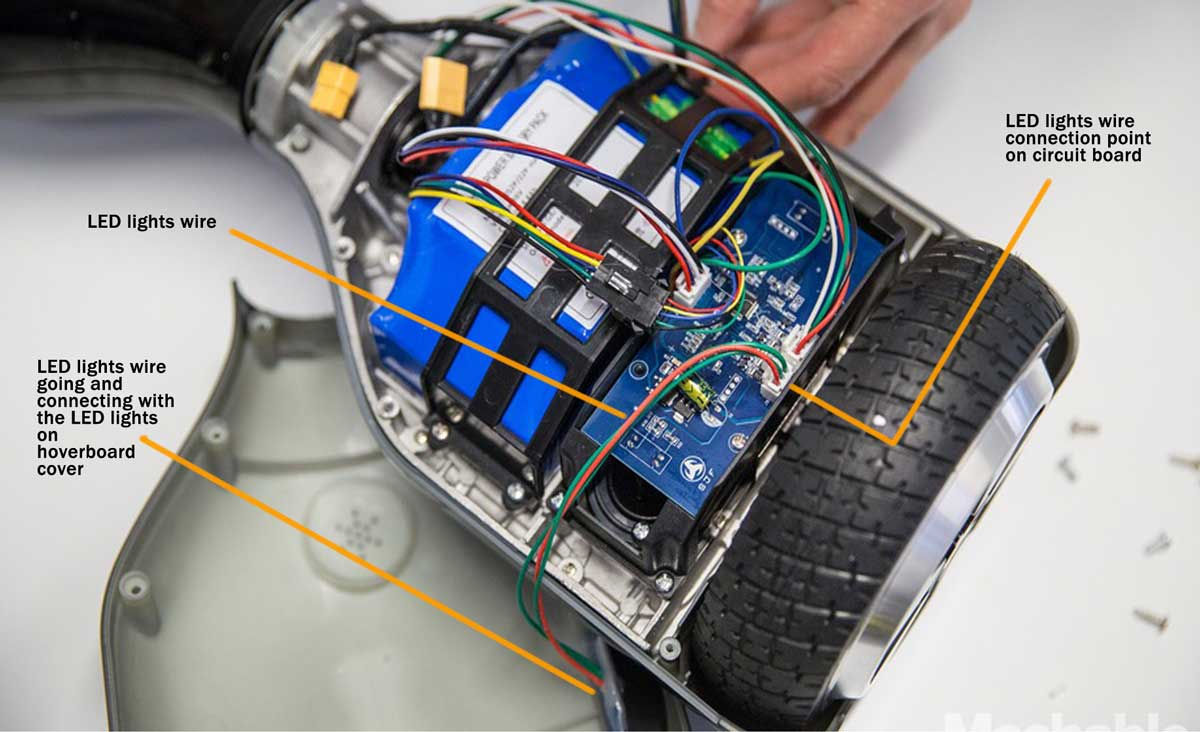
Hoverboard motor wiring combination diagram (fix hoverboard shaking) a common problem with hoverboards is that sometimes they will spin out of control or go crazy in circles. Injunction of two wires is usually indicated by black dot in the junction of 2 lines. Some wheels have different wiring inside, but the solution is easy and it is if that did.
Now insert the charger into the charger port on the board. Before you continue, be sure to unplug your power brick. Then the color should be solid red.
When your hoverboard battery is full, the display light on You have to ensure that the hoverboard has correctly plugged into the charger port. Since in this case the red light does not blink when the charger is plugged into the wall and not plugged into the hoverboard that indicates that the battery charger is most likely working properly and that the problem is most likely with the charger port or.
You must do this on both sides. For an engineer, hoverboard construction and wiring is intriguing.

Hoverboard Wheel Wiring Diagram
Hoverboard Repair Tutorial for Loose Connections and


Hoverboard Wheel Wiring Diagram
Hoverboard Repair Tutorial for Loose Connections and
Hoverboard Wiring Diagram Wiring Diagram
How to Build a DIY Hoverboard Best Electric Hoverboard

Wiring Diagram For Hoverboard
Wiring Diagram For Hoverboard
34 Hoverboard Wiring Diagram Wiring Diagram Niche

Wiring Diagram For Hoverboard

How to Build a DIY Hoverboard — Best Electric Hoverboard
Hoverboard Repair Tutorial for Loose Connections and
What Hoverboard That Do Not Blow Up in 2019 (How to prevent)?


Hoverboard Wheel Wiring Diagram

Self Balancing Scooter/Hoverboard Technology Explained
[DIAGRAM] Electric Bicycle Controller Wiring Diagram And

How To Fix Broken Charging Port On Hoverboard Smart
Hoverboard Repair Tutorial for Loose Connections and

Hoverboard Wiring Diagram Wiring Diagram