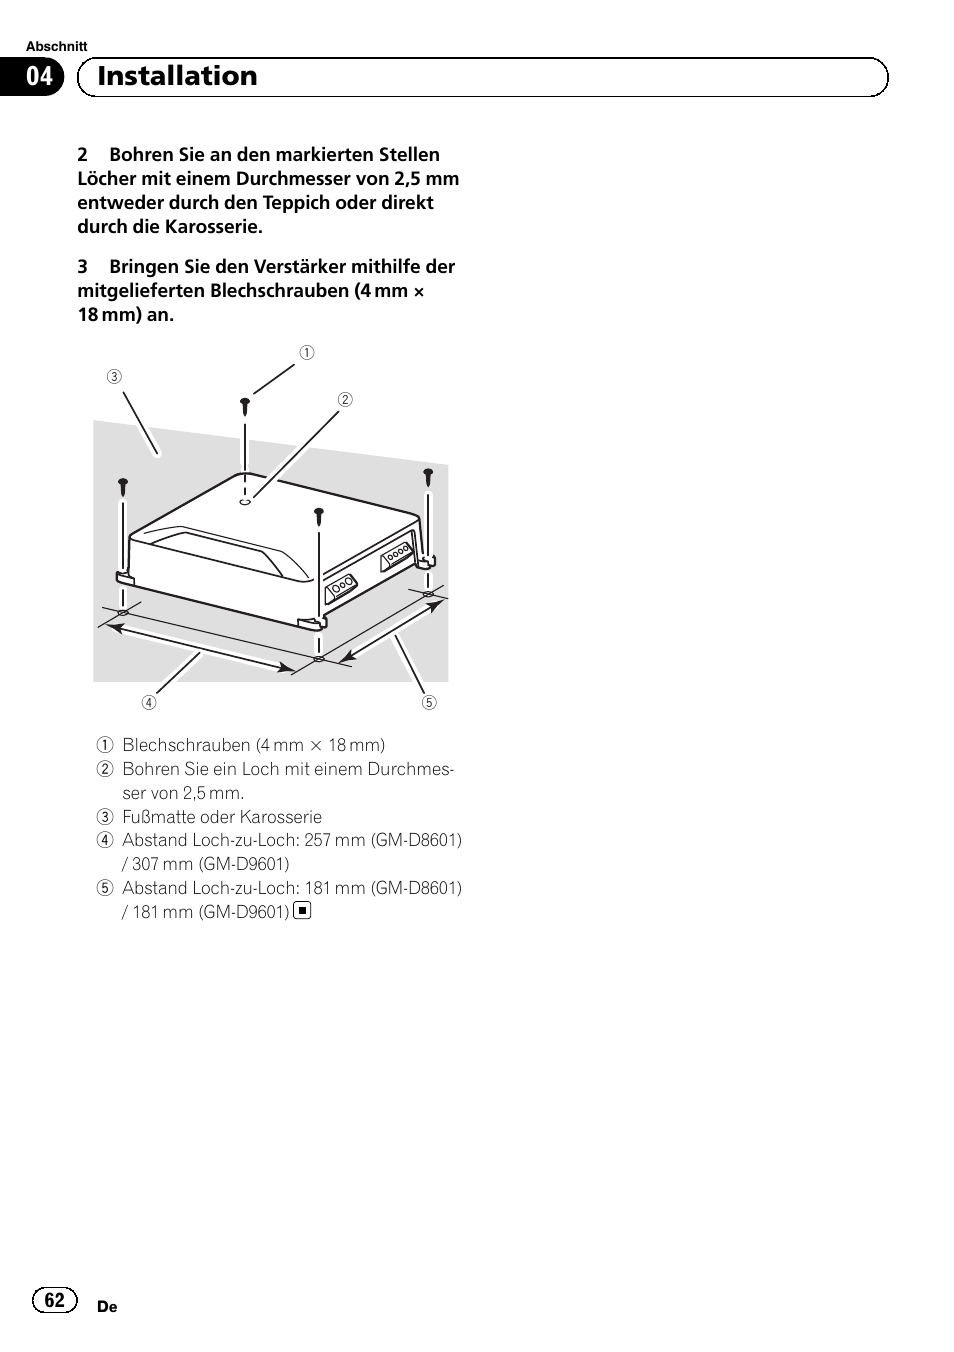
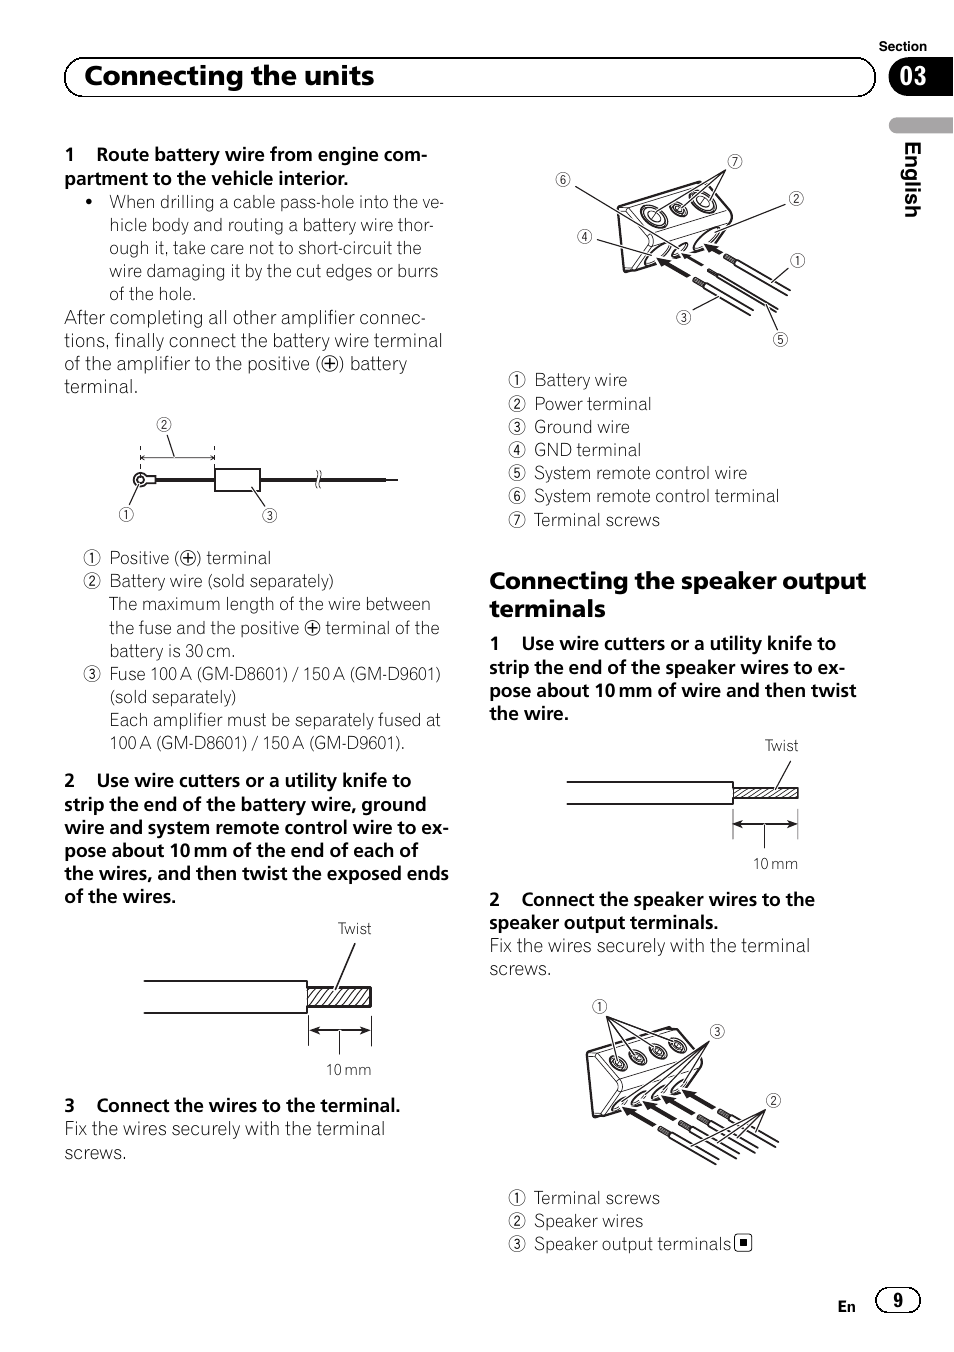
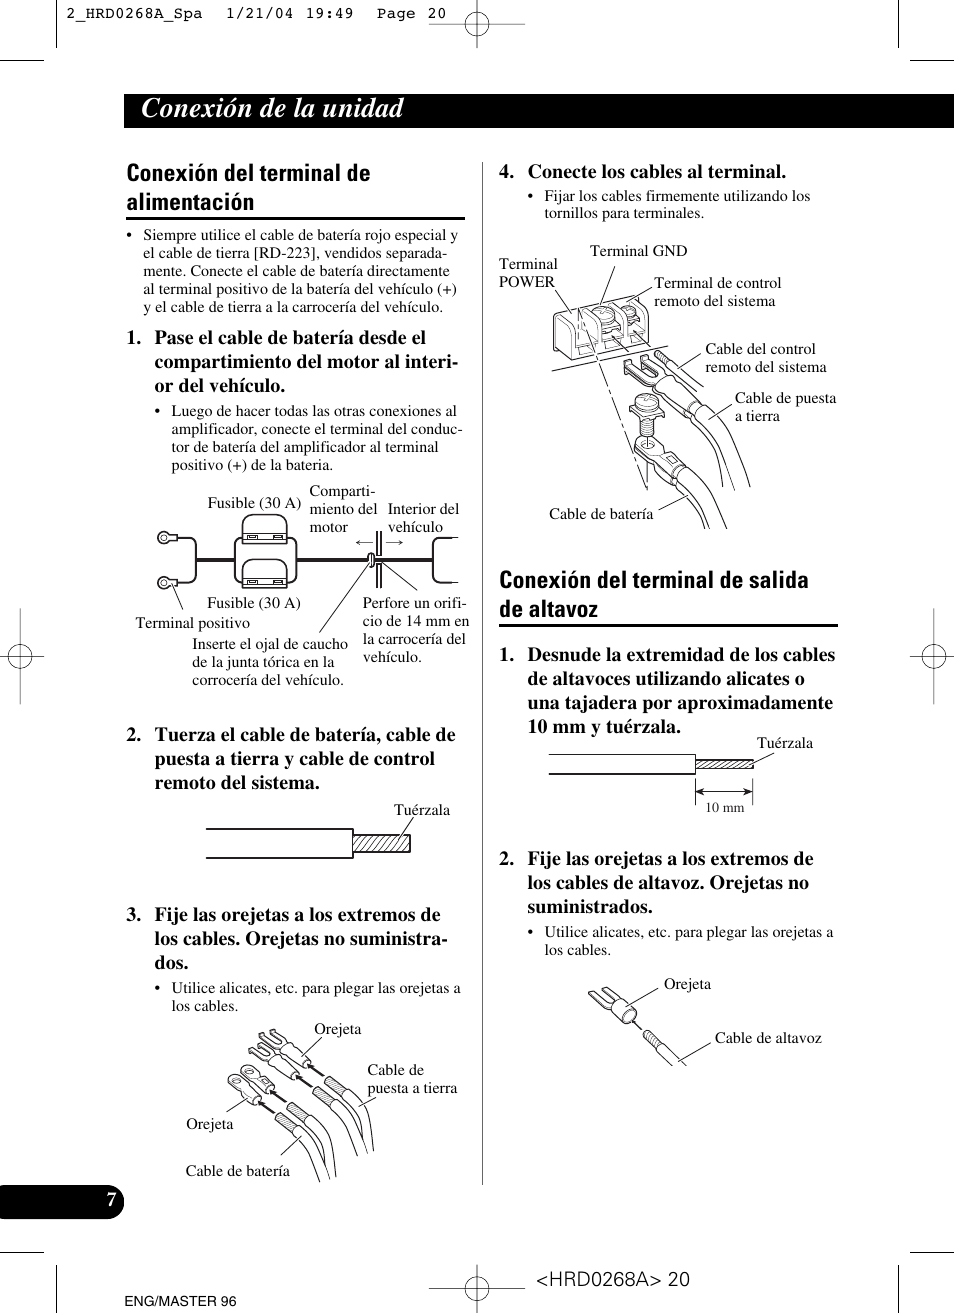
Use wire cutters or a utility knife to battery is 30 cm (12 in.). The battery wire, the ground wire and the optional direct ground wire must be same size.
Pioneer Gm D9601 Wiring Diagram ZTXXXX
Philips car audio schematic diagrams and service manuals.
Pioneer gm d8601 wiring diagram. An amplifier shouldn’t take up too much space, especially in your car. Otherwise, the arrangement will not function as it ought to be. After making all other connections at the amplifier, connect the battery wire terminal of the amplifier to the positive + terminal of the battery.
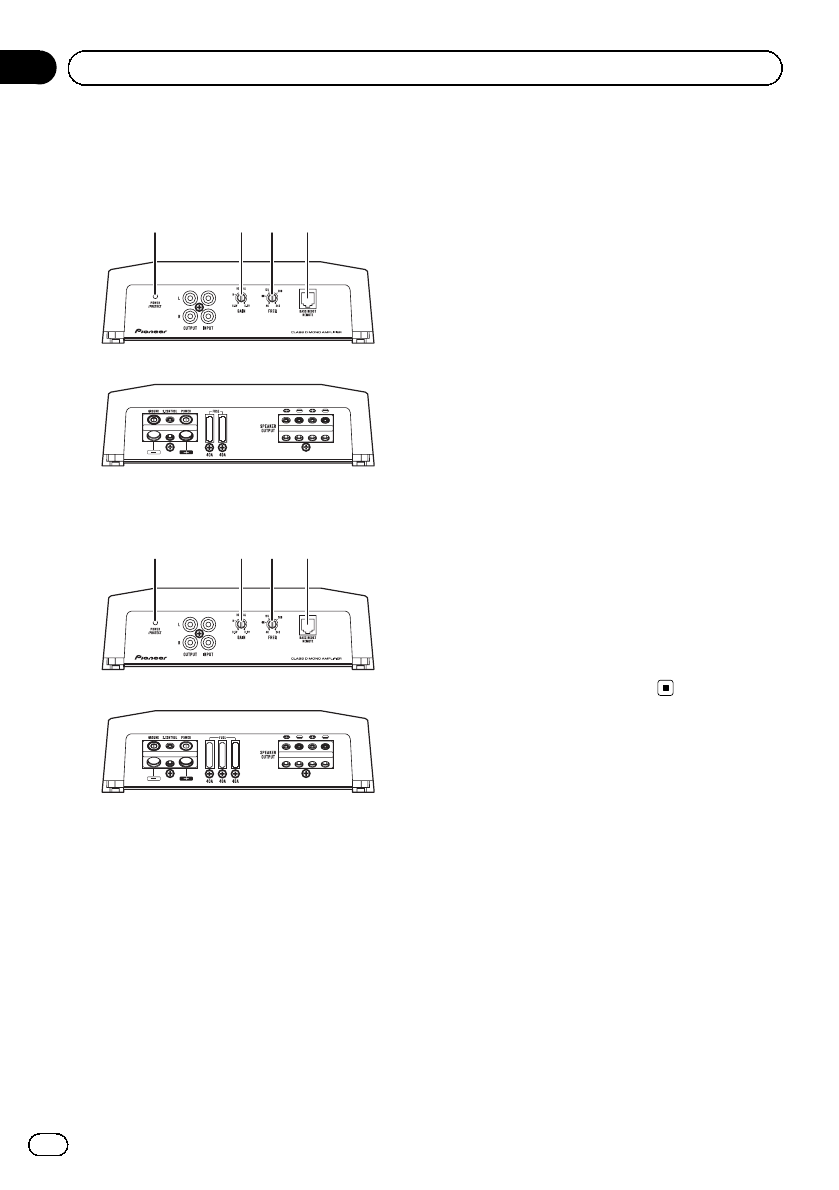
For the wire size, refer to connecting the power terminal on page 8. The bass knob on the. Connection diagram h 2 a 9 8 6 7 3 b c d 5 j i f g e 4 1 1 battery wire (sold separately)!
My question is on the wiring. Not merely will it help you attain your desired results faster but additionally make the whole procedure easier for everybody. Zoom out zoom in vorherige seite 1 / 92.
Connection diagram 2 3 5 1 g 1 battery wire (sold separately) ! Refer to connections when using the speaker input wire on page 9. So, the install goes faster, you save money, and you've got a pioneer amp in your vehicle.
You will receive the manual in your email within minutes. English, german, dutch, french, italian, spanish as an attachment in your email. Wiring diagram consists of several in depth illustrations that show the relationship of varied things.
Each component ought to be placed and linked to different parts in particular manner. One way being series and the other parallel. 2 review (s) / write a review.
The manual is 4,64 mb in size. It contains directions and diagrams for various varieties of wiring strategies as well as other products like lights, windows, and so forth. For the wire size, refer to connecting the power terminal.the battery wire, the groundwire and the optional direct groundwire must be same size.
Free online library on electronics order a schematic diagram and get it today. 0 to +18 db • class d circuitry • dimensions: After making all other connections at the amplifier, connect the battery wire terminal of the amplifier to the positive + terminal of the battery.
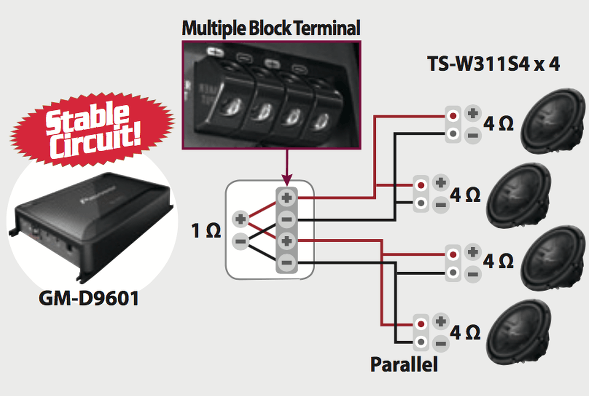
Ctrl+f (enter the name of the firm or digital value of the model) panasonic car audio schematic diagrams and service manuals. Connecting the units, connection diagram, before connecting the amplifier. I looked at the wiring diagrams on the kicker website and noticed that there is two ways to get them wired to 4 ohms.
Do i need to buy the pioneer part to use that feature or can i buy one off ebay with the same connection and plug and play? For the wire size, refer to connecting the power terminal on page 9. When using the speaker input wire.
2 use wire cutters or a utility knife to strip the end of the battery wire, ground You would need a wiring diagram for both pieces or some kind of confirmation they are compatible. £103.99 save £96.00 (48%) was:
I have two four ohm kicker compvr 12's dual voice coils. To protect the wiring, wrap sections in contact with metal parts in adhesive tape. Please note that in some cases we also offer just the.
With this sort of an illustrative manual, you will be able to troubleshoot, prevent, and total your tasks with ease. In fact we'll even help you build onto your system. Car radio wire diagram stereo wiring diagram gm radio wiring diagram.
For more help on selecting the right amp for your sub(s), please contact an advisor directly by phone (888.955.6000) or online chat; Not merely will it help you attain your desired results faster, but additionally make the whole procedure easier for everybody. 1 use wire cutters or a utility knife to strip the end of the speaker wires to expose about 10 mm (3/8 in.) of wire and then twist the wire.
The diagram shows a different wiring path than how my buddy hooked it up. 10 mm (3/8 in.) 10 mm (3/8 in.) 3 connect the wires to the terminal. Connection diagram 7 2 3 6 8 4 5 9 b c a 1 e d i h j f g.
Peugeot car audio schematic diagrams and service manuals. After makingall other connectionsat the amplifier,connectthe batterywire terminalof the amplifierto the positive + terminalof the battery. Will there be any difference?
The battery wire, the ground wire and the optional direct ground wire must be same size. They can help give you a more. 300w x 1 @ 4 ohms 500w x 1 @ 2 ohms 800w x 1 @ 1 ohm • total peak power:
Connecting the speaker output terminals. If you have not received an email, then probably have entered the wrong.
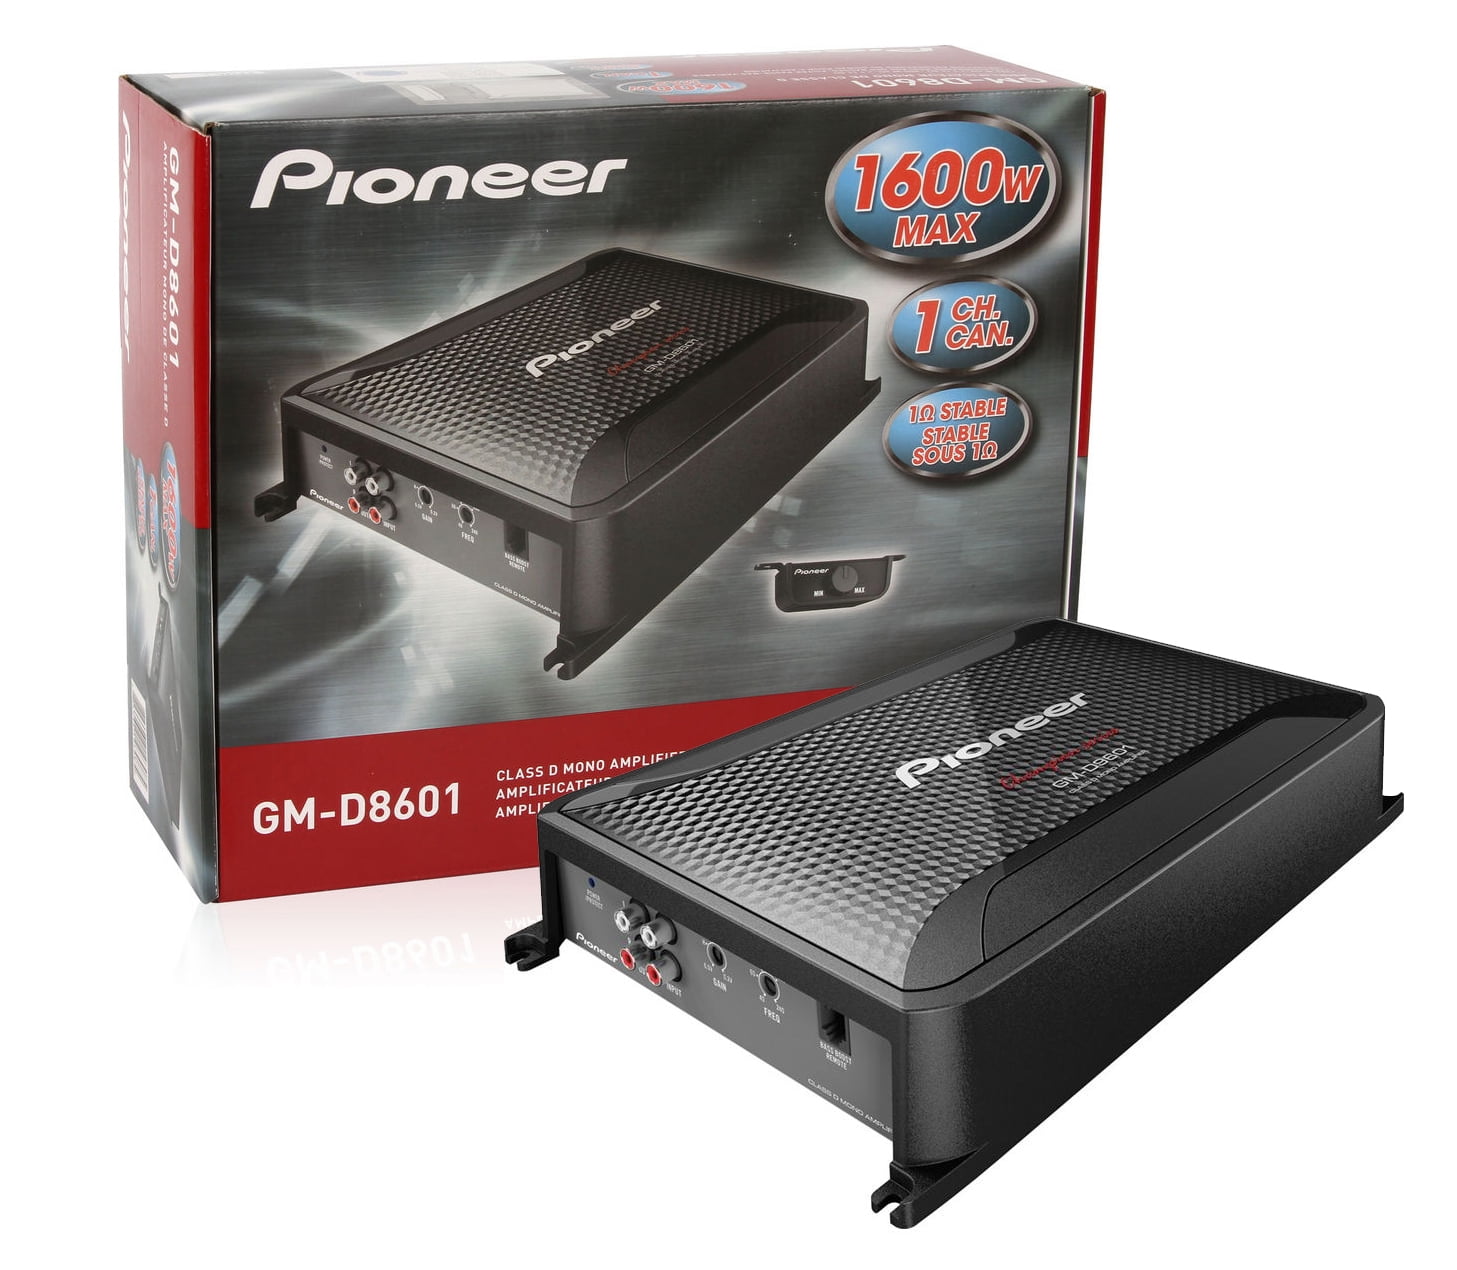
Pioneer GMD8601 1600w Class D Car Audio Subwoofer


Doorbell Wiring Diagram Free Wiring Diagram
03 connecting the units, Connecting the speaker output
84+ Wiring Diagram Pioneer Gm D8601 Wiring Collections
Pioneer Gm D9601 Wiring Diagram ZTXXXX

84+ Wiring Diagram Pioneer Gm D8601 Wiring Collections

Pioneer Gm D9601 Wiring Diagram ZTXXXX
Pioneer GMD8601 1600w Class D Car Audio Subwoofer


Pioneer Gm D9601 Wiring Diagram ZTXXXX

Pioneer GMD8601 4 Gauge 1600W Monoblock ClassD Car
Pioneer gm d9601 service manual
Pioneer Gm D9601 Wiring Diagram ZTXXXX

84+ Wiring Diagram Pioneer Gm D8601 Wiring Collections
Pioneer GMD8601 4 Gauge 1600W Monoblock ClassD Car
Pioneer MonoAmp Subwoofer Wiring Question World
Pioneer GMD8601 Mono subwoofer amplifier — 800 watts RMS

Pioneer GMD8601 Class D Mono Amplifier with Wired Bass
Pioneer Gm D9601 Wiring Diagram ZTXXXX
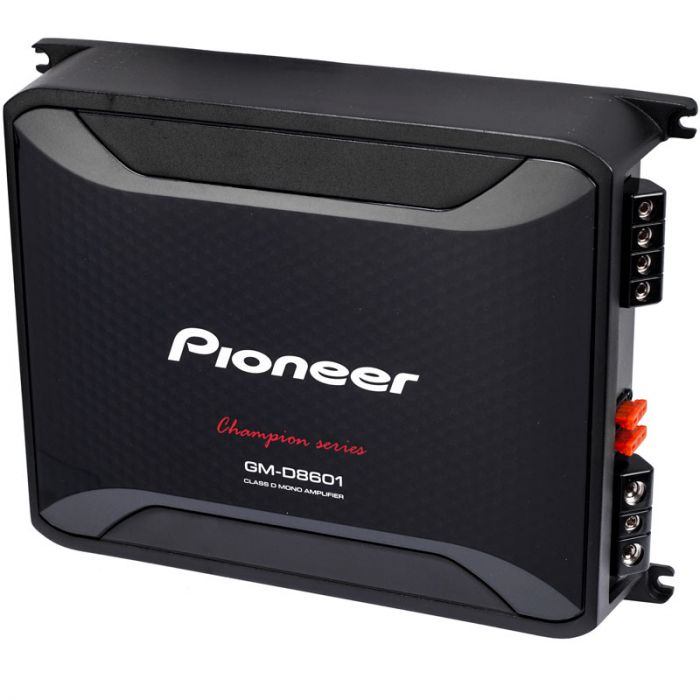
Pioneer GMD8601 1,600 Watt Class D Mono Amplifier with